

This content has been automatically translated from Ukrainian.
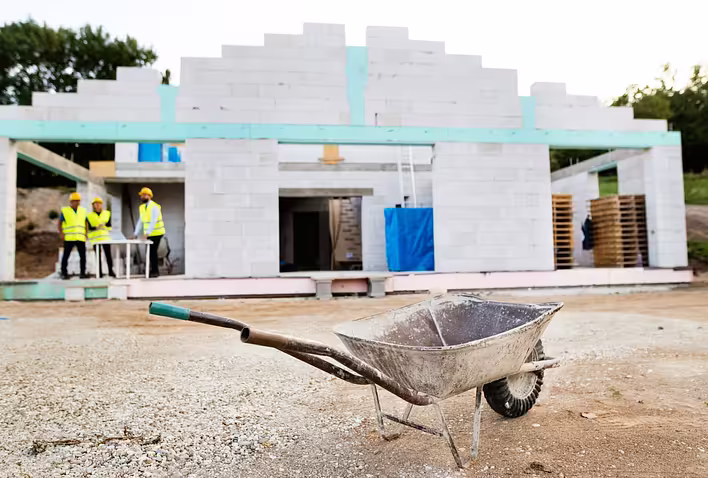
Construction with aerated concrete in the Kharkiv region is often interrupted for winter. The reasons vary - the end of funding, changes in plans, or simply a late start to the construction season. Construction can be halted at any moment, but leaving unprotected aerated concrete walls for winter is a serious mistake that leads to significant material damage and additional costs in spring. Let's discuss how to properly preserve aerated concrete walls so that construction can continue in spring without unpleasant surprises.
Why aerated concrete needs winter preservation
Aerated concrete is a porous material with water absorption of 20-25% by weight. Each pore and capillary in the structure of the block is a potential place where moisture accumulates. In autumn and winter, this moisture freezes and expands. Water increases in volume by approximately 9% when frozen, which means significant internal stresses for porous aerated concrete.
In one season, with many cycles of freezing and thawing - and in Kharkiv, there can be 40-60 of them a year - unprotected aerated concrete can lose up to 15-20% of its strength. The surface layer of the blocks crumbles, cracks, and peels off. The adhesive joints between the blocks become soaked during thawing and partially break down.
Moreover, moisture that penetrates the masonry during winter downtime takes a long time to dry in spring, especially in the lower rows. Laying subsequent rows on a damp base worsens the adhesive's adhesion and reduces the quality of the masonry.
When to start preservation
The optimal time for preservation is before the onset of stable rains and before the first frosts. For Kharkiv, this is approximately October. It is not advisable to wait for the first snow and frosts - it is better to preserve a little earlier than too late.
Signs that preservation cannot be postponed:
- night temperatures consistently drop below +5°C
- frequent prolonged rains wet the open masonry
- the weather forecast shows frost for a week
- the construction season is effectively over, and no further work is planned until spring
Step-by-step plan for preserving aerated concrete walls
Step 1 - completing current work and preparation
Before preservation, it is advisable to complete the masonry up to a level where stopping will be least critical. Ideally - up to the level of the reinforcement belt or to the top of one of the floors. Stopping in the middle of a floor is acceptable but requires additional protection for the upper unprotected row.
Remove all construction waste and materials left on the walls and inside the building. Clean any adhesive residues on the surfaces of the blocks with a brush. The surface of the upper row should be clean and even.
Step 2 - protecting the upper edge of the walls
This is the most important element of preservation. The upper edge of unprotected walls receives the largest amount of precipitation. Water that gets in from above soaks down through the masonry and wets a significant volume of material.
Several methods are used to protect the upper edge. The simplest and most effective is laying polyethylene film with a thickness of 200-300 microns over the top of the walls, extending at least 300-400 mm onto the outer and inner surfaces, and securing it with battens or bags of sand. The film protects against direct rain and snow.
A more reliable option is a temporary roof made of profiled sheeting or roofing felt on a lightweight frame. If construction is halted at a level where the rafter system is already planned - it is better to install at least temporary rafters and cover them with any sheet material.
Step 3 - hydrophobization of the external surface of the walls
Applying a hydrophobizing penetrating compound to the external surfaces of aerated concrete walls significantly reduces the material's water absorption during winter downtime. The hydrophobizer penetrates the pores of the aerated concrete and creates a water-repellent barrier without violating vapor permeability.
It is applied with a brush or sprayer in an even layer over the entire external surface of the walls. The treatment is carried out at temperatures not lower than +5°C and in dry weather. One layer is sufficient for seasonal protection.
Step 4 - protecting openings and cuts
Windows and doors, if they are not yet installed, are the largest sources of moisture and cold penetration into the building. Openings are covered with polyethylene film stretched over a temporary frame or simply boarded up with OSB or plywood sheets.
Ventilation openings and vents are closed with temporary plugs to prevent strong drafts and freezing of the internal space.
Step 5 - protecting materials left on the site
Unused aerated blocks from the current season should be stored on pallets with a clearance from the ground of at least 100-150 mm. They should be covered with polyethylene film or tarpaulin from the top and sides, leaving a gap at the bottom for ventilation to prevent condensation under the cover.
Thin-layer adhesive should be stored in a closed room at positive temperatures. Frozen adhesive, even after thawing, may lose some of its properties.
Advantages and disadvantages of different preservation methods
Polyethylene film:
- the most accessible and cheapest option
- easy to install and dismantle in spring
- can be torn off by strong winds without reliable fastening
- can condense moisture underneath if it does not fit tightly
Temporary roofing:
- reliable protection from precipitation throughout the winter
- requires higher installation costs
- protects not only the upper edge but also the internal space of the building
- can use elements of the future permanent roofing
Hydrophobization of the surface:
- effective additional protection for external surfaces
- does not replace the protection of the upper edge but complements it
- relatively affordable treatment costs
- requires application at positive temperatures
How to resume construction in spring
Spring resumption of construction is no less responsible than preservation itself.
Inspection of masonry - before continuing work, all walls should be carefully inspected. Check for cracks, delaminations, and damage to adhesive joints. Small surface damage to the upper rows is normal after winter. Deep cracks and mass delamination of blocks signal serious problems.
Drying of masonry - before resuming masonry, the walls must dry out after winter. Do not rush to cover damp masonry with new rows - adhesive on a damp base will have reduced adhesion. Allow the walls to dry naturally for 2-3 weeks at positive temperatures.
Sanding the upper row - the upper row that wintered without protection or with insufficient protection should be sanded with a float to a clean, even surface. This eliminates surface damage and provides a level base for the masonry of subsequent rows.
Restoring masonry - the first batch of adhesive after the winter break is applied to a small area and adhesion is checked. The adhesive should bond evenly and not detach from the base. If adhesion is poor - additional priming of the surface solves the problem.
In our construction store in Kharkiv, UkrStroyka https://ukrstroyka.com.ua/ all materials for preserving aerated concrete walls for winter are available: polyethylene films of various thicknesses, hydrophobizing compounds for aerated concrete, thin-layer adhesives for restoring masonry in spring, and materials for protecting openings. Consultants will provide practical advice on the proper preservation of your specific object and select optimal materials.